Showing posts with label Dessert. Show all posts

Saturday, April 30, 2011

Four Lemon Tart

Four Lemon Tart

A year ago, I bought a tart pan as a gift for someone and tucked it away and forgot about it.  It always happens that when you are looking for something else, you find something you forgot you had.  I have no idea who the tart pan was intended for, but I made this lemon tart for Easter dessert with it, so I guess it's mine now!

Much like always, I reviewed and researched several tart recipes that included lemons or some other variation of fruit and assorted toppings and decided that this version seemed like the strongest candidate for a light dessert after a big dinner.  It came out perfect and after rushing around preparing for this dinner, I thought, forget the glazed spiral sliced ham, where's the dessert!? In my opinion, you could serve this any time of year and it would be amazing.  Who doesn't love lemon desserts?

Four Lemon Tart

Ingredients
1/2 C. (1 stick) butter, melted
2 T. finely grated lemon zest, divided
cooking spray
1 3/4 C. flour
1 1/4 C. sugar, divided
dash salt
6 large eggs
1 C. fresh squeezed lemon juice from four lemons
1/2 C. heavy whipping cream
1/2 C. confectioner's sugar for dusting

Preparation
This recipe will require an 11 inch tart pan.  Preheat oven to 350 degrees.

Melt your butter and pour into a mixing bowl.  Mix in 1 tablespoon of the lemon zest.  Let this mixture stand for about five minutes and using the cooking spray, prepare your tart pan.

Add flour, 1/3 cup of the sugar and salt to a medium bowl and stir together.  Slowly add the butter mixture and stir until combined and dough resembles course pea size pieces and you can squeeze it between your thumb and index finger and it sticks together.  Turn dough out onto prepared tart pan and using the bottom of a tumbler or by hand, flatten dough onto bottom and shape up the sides of the pan.  Make sure to smooth and flatten the edge at the edge of the pan so it looks neat when it comes out of the oven.  Bake for 18 minutes.  Remove from oven and cool on rack.

Add the remaining sugar and lemon zest to your food processor and blend until the zest is finely ground.  In another mixing bowl, add eggs and sugar/zest mixture, lemon juice and salt and whisk until smooth.

Add whipping cream to a mixing bowl and using electic mixer whip cream until soft peaks form.  Fold the whipping cream into the egg mixture until just blended.

Place your cooled tart pan in the center of a cookie sheet and pour the batter into your tart pan.  Place tart in the oven and bake for 30 minutes and the filling is set in the center.  The edges may become a light golden brown.  Remove the tart carefully from the oven and rest until tart is cooled completely.  It is important to know not to touch the top of the tart despite how tempted you are to do so.  The top of the tart is sticky and it will adhere to your finger leaving an unsightly divit on the top that will be noticable despite how much confectioners sugar you use trying to cover it.

After the tart has cooled and just prior to serving, you can place the tart on a cake stand and sift confectioners sugar over the top, or slice tart in wedges individually and sift the sugar over the top after it's plated.

Leave me a comment and tell me how much you love it!

Friday, March 18, 2011

Bananas Foster

Bananas Foster

Bananas Foster is a dessert made of bananas, brown sugar, butter, cinnamon, dark rum and banana liqueur.  These ingredients are cooked down, ignited and poured over vanilla ice cream.  When the hot caramel-like sauce hits cold icecream, a small crisp caramel crust is created.  Originating from New Orleans, Louisiana in 1951 and named after Richard Foster, a crime commissioner, it remains a popular dessert today.

Enough about that.  I first had this somewhere around 2001 or 2002.  Tina, who had drawn the dessert card, brought it to Dinner Club at my house and I remember standing in my kitchen wondering what in the world is she making and what is she going to do with that lighter??  Confident in her culinary skill with bananas and recipe in hand she was waving it around and telling everyone how great it was and how much they were going to love it.   I admit to thinking my friend must've gone bizerk if she was igniting anything in my tiny, little, table-for-one kitchen, but she was right.  We all loved it.  I'm trying to remember exactly what the Dinner Club theme was that night, but it really doesn't matter.  Whether you are cooking this dessert up in celebration of Mardi Gras or looking for a warm dessert to create a happy ending to a fall or winter meal, you will just have to try this.  Yes, I know.  There's four tablespoons of butter.  Get over it.  We're really cooking here!

Bananas Foster

Ingredients
4 T. butter
1/2 C. brown sugar
2 bananas sliced
1/2 t. cinnamon
1 T. banana liqueur
1/4 C. dark rum

Directions
In a skillet, add the butter and brown sugar over medium heat and stir often until butter is melted.  Add cinnamon and stir until combined.  Add bananas and cook until carmelized on both sides.  *Carefully remove pan from heat, add banana liqueur and rum and use a long lighter to ignite.  Return to the heat to burn off the alcohol.  Stir one last time and pour over vanilla ice cream.  Let set for a moment and serve.  Bananas Foster is such a special treat!

*Cook's Tip:  Alcohol is extremely flammable.  Use caution when igniting your sauce. Be sure to hold the pan away from you and others and do not lean over it.  Now read the Cook's Tip over again and take it seriously.  No goofing around.

Tuesday, March 15, 2011

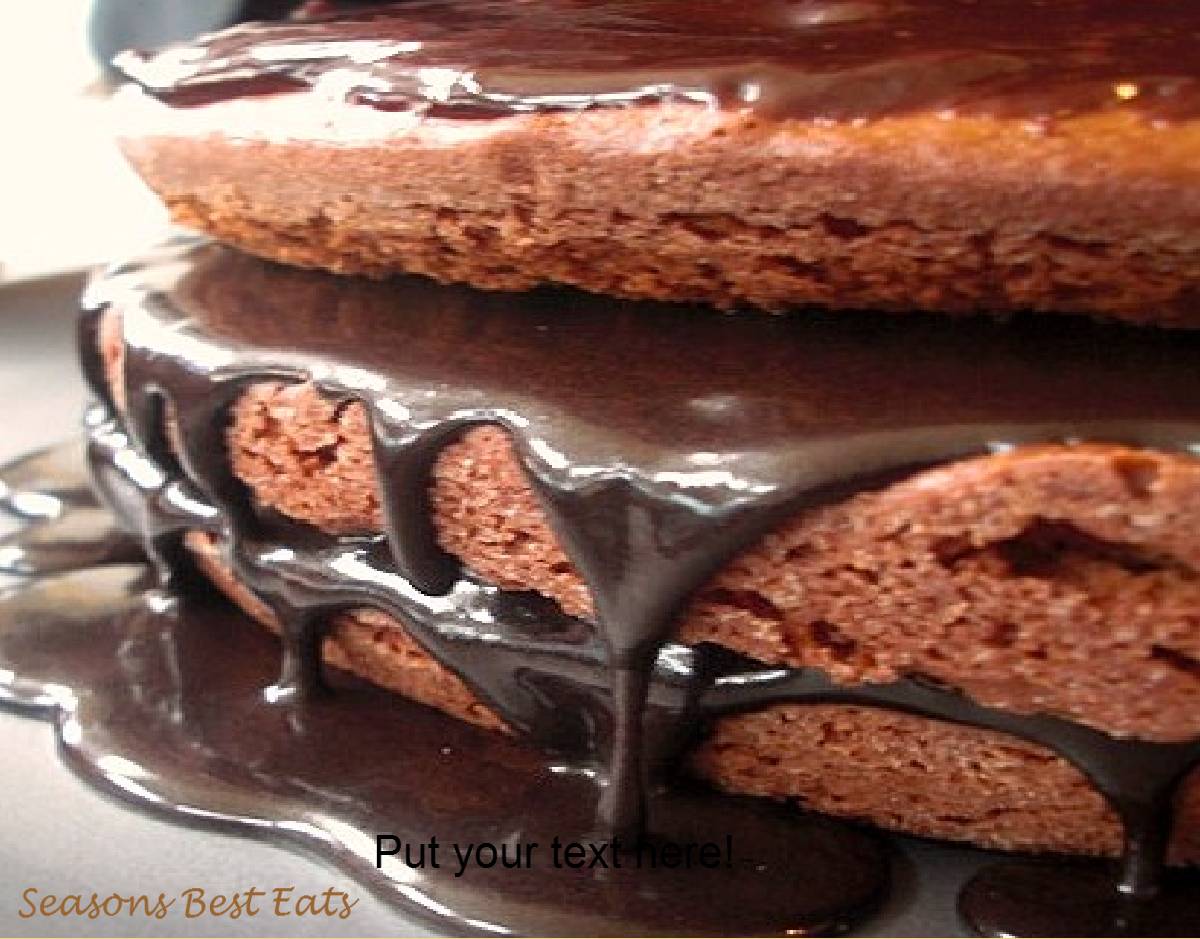
Chocolate Souffle' Cake

Chocolate Souffle' Cake

A couple things happened this week.  I got a new camera so I can take better pictures of all the food on my blog and I'm having a blast learning about it.  Second, a quest for better health led me straight to a Chocolate Souffle' Cake at the same time I was planning a menu for a good friends birthday.  It happens to be a very funny story. 

The weather has still been pretty chilly and rainy around here which doesn't do much to improve my low motivation for working out these days.  I have been asking friends to walk trails and run with me, but I think their motivation is actually a lot lower than mine!  Somehow the world became a spooky place to do trail running on your own, so I like to go with others, only others aren't going.  So now I have high motivation and high commitment and everyone I know has neither.  Time to turn to Plan B which is running on the treadmill.  I like my treadmill, but it's boring. I'm sure there's some way to improve the treadmill experience.  In order to alleviate the boredom of running a 5K and staring at the wall, I moved the treadmill in front of the window and put a TV in front of it.  The problem is that the TV is the old kind with the VHS tape deck built right in and the fact that I'm too much of a dufus to fix the TV to get a signal on any other channel other than channel five.  For the record, I really don't watch that much TV, so figuring out the remote control seems a waste of time.  Putting my high motivation, high commitment to good use, I dug around in some boxes to find an old movie to watch and you'll never believe what I found.  A VHS tape of Food Network from ten years ago!  Back in 2001, I didn't have cable, so my sister would record hours and hours of Food Network and give me the tapes to watch at home.  It was hilarious to see Emeril Lagasse and Martha Stewart back then, not to mention all the cool Food Network shows that were on before reality television became the rave.  What ever happened to Cowboy Kitchen and Jacques Torres (and his chocolate for that matter?)  Now that's entertainment.  That was the best 5k I ever did run.

The recording had to have taken place around this time of year because Martha (pre-jail) was making her Chocolate Souffle' Cake as I was panting along in front of her.  What a great idea for the dessert portion of the birthday dinner I was making for my friend.  Mine ended up looking as great as hers, so here is her recipe, but be warned...I added a little more chocolate and vanilla!  Sorry Miss Martha, I think it made for a better tasting chocolate souffle' cake!

Chocolate Souffle' Cake (with vanilla!)
Based on Martha Stewart's Chocolate Souffle' Cake

Ingredients
Olive Oil Spray
1 C. plus 2 T. granulated sugar, divided
3/4 C. butter
8 oz. semisweet chocolate, chopped (use best quality chocolate)
1 t. vanilla extract
3 egg yolks
1 egg
6 egg whites
Cocoa powder for dusting

Directions
Preheat oven to 300 degrees.  Using spray, grease a 9 inch springform pan and dust with the 2 T. of granulated sugar. 

Over medium heat, melt butter and chocolate together in a double boiler over simmering water and stir occassionally with a heat proof rubber spatula until all the butter has melted.  Add vanilla and stir.  Remove from heat and set aside.

With an electric mixer fitted with a whisk attachment, add the egg yolks and 1/2 C. sugar and blend at high speed until pale yellow and thick, about 4 to 5 minutes.  Set aside. 

Using a very clean and dry mixing bowl attached to electric mixer and using whisk attachment, whisk egg whites and remaining 1/2 C. sugar until thick and batter forms soft peaks when you lift the whisk.  This step should take about three minutes.  Set aside.

Add a very small portion of the chocolate mixture to the egg yolk mixture and stir to combine.  This is called "tempering" so you don't make scrambled egg chocolate souffle' cake.  You are bringing up the heat slowly in order to combine the hot ingredients, stir it and cool it down.  Slowly add the remaining chocolate mixture while stirring the combined mixture until it comes together.  Using a rubber spatula, add the big foamy egg whites all at once to your combined chocolate and egg yolk mixture and fold it into the batter, gently.  Repeat folding until just combined.  You want your cake to be nice and fluffy and overmixing will flatten your glorious cake prematurely.  We don't want that!

Pour batter into prepared springform pan and cook for 60 minutes.  Your cake is going to do what all souffle's are supposed to do and rise in the oven.  After it's done cooking, remove from oven and place on counter to cool.  The cake will flatten and this is okay.  Don't panic.  It is supposed to look rustic, rough and have cracks.  When it's cool, dust with cocoa and place on a beautiful pedistal stand.  It's going to be perfect and taste like a dream.  The birthday girl said, "It just melts in your mouth.  I love it".  And you will too!!

Sunday, February 20, 2011

Roasted Hazelnut Chocolate Caramel Shortbread

Roasted Hazelnut Chocolate Caramel Shortbread

This recipe was actually made for our December Dinner Club at Stephanie's house.  These beautiful cookie bars were made by my friend and Dinner Club member, Kathy for our annual cookie exchange.  Immediately after dinner, we each bring to the table the "cookie" we secretly made for the exchange.  This is a time for ooohs and aaaahs.  When this cookie debuted, there was much excitement.  This is not the original recipe she used which is listed at http://www.eatwisconsincheese.com/, but I used hazelnuts instead of almonds, two different extracts and more cinnamon. 

So, how does this recipe fit into February?  If you are looking to impress (as we all were when we saw these) your sweetie pie will  think you went to a ton of work making them.  Wrapped in cute little cupcake wrappers, they look like they just came from a bakery.  No kidding.  For February,  I suggest putting a little candy heart on top of each that says exactly how you feel about them.  It could be "BABY DOLL", "I LOVE YOU" or "LETS BOOGIE"!

Roasted Hazelnut Chocolate Caramel Shortbread

Ingredients

Shortbread:
1/2 C. roasted hazelnuts
1 1/2 C. flour
1/2 t. salt
1 t. cinnamon
1 1/4 sticks of butter
1/2 C. light brown sugar
1/2 teaspoon almond extract
1/2 teaspoon vanilla extract

Chocolate Caramel:
2. C. chocolate chips
1 1/2 C. sugar
1/4 C. light corn syrup
1/4 C. water
3/4 stick of butter
1 C. heavy cream
1/2 t. salt
1 T. sea salt or flavored salt found in specialty stores

Directions

Preheat oven to 350 degrees.

Tracy & Stephanie
Dinner Club - December 2010
Shortbread:  Get out a 9x9 inch pan and cover bottom with parchment paper or foil inside the pan.  Butter the interior right on top of the parchment.  Using your cuisinart, process hazelnuts until fine.  In a separate bowl, whisk together ground hazelnuts, flour, salt and cinnamon and set aside.

In a mixer, beat butter, brown sugar and extracts together until light.  Add the flour mixture from above and work it in until a dough forms.  Remove dough from bowl and press it evenly into the bottom of a prepared pan.  Bake until golden, about 28 minutes.

Chocolate Caramel:  Place chocolate chips in a heat proof bowl.  In a medium saucepan, combine sugar, corn syrup and water.  Cook over medium heat for about 10 minutes until mixture is thick.  Remove from heat and immediatly pour over chocolate.  Add butter, heavy cream and salt and stir until combined.  Return saucepan to heat and simmer, stirring until smooth.  Simmer about 2 minutes.  Remove from heat and pour mixture over shortbread.  Cool overnight in refrigerator.

Before serving, sprinkle with sea salt.  To remove from pan, grab sides of parchment and carefully lift it from the pan.  Set on cool surface and use a hot knife blade to cut bars.  You can do this by dipping knife end in very hot water and wiping dry right before cutting.  These bars can be stored in the refrigerator for a week.

Enjoy!

Saturday, February 12, 2011

La Tarte de Crème de chocolat / Chocolate Cream Pie

La Tarte de Crème de chocolat or
Chocolate Cream Pie
God gave the angels wings and gave the humans chocolate.
- Author Unknown


Ooooh luscious.  I love chocolate.  Chocolate cream pie should be creamy, you know?  Smooth, cold and thick.   The taste needs to be rich and bold and stand up to a knife.  With cream pies, most people think "light and fluffy".  After all, it's a cream pie, not a cheesecake.  I like them rich and dense, regardless.  I'm here to tell you that if you're using an instant pudding to make your cream pies, you are missing out.  Take your time and do it like your grandma used to do it.  Chocolate cream pie doesn't get any better than this.

La Tarte de Crème de chocolat
 Ingredients
Crust
8 oz chocolate wafer cookies, crushed
4 1/2 T. melted butter
2 T. sugar

Filling
1 C. milk
1 C. cream
1/2 C. Sugar
3 egg yolks
1/4 C. cornstarch
1/4 t. salt
8 oz. chocolate chips
1/4 C. unsweetened cocoa

Whipped Cream
3/4 C. heavy whipped cream
1 t. vanilla extract
2 T. sugar

Directions

Preheat the oven to 350 degrees.

In a bowl, mix the cookie crumbs with the butter and sugar and pour into prepared glass pie plate.  Press crust to bottom and sides of the pie plate until uniform and smooth.  Place in oven and bake at 350 degrees for approximately 8 minutes.  Remove from oven and place on counter to cool.

In a bowl, whisk the egg yolks and 1/4 C. of sugar together.  Add the salt and mix until combined.  In a separate saucepan over medium heat add milk and remaining 1/4 C. sugar and heat until bubbly stirring occassionally.   Turn off heat.  Slowly add a spoonful of the milk mixture to the egg mixture to temper your eggs and stir.  You are bringing your egg mixture up to temperature.  Pouring too much hot milk liquid too fast into your egg mixture will result in scrambling your eggs.  Again, add another spoonful of the hot milk mixture to the eggs and stir.  Finally, add you egg mixture into the saucepan with the milk and stir swiftly until combined.  Add chocolate chips and cocoa powder and mix well. Pour mixture into your prepared cookie crust and spread to edges, smoothing with a rubber spatula.  Place a piece of cling wrap directly on surface of chocolate mixture.  Refrigerate for at least three hours to set. 

To prepare your whipping cream, pour heavy cream into a bowl, add vanilla and sugar and beat until soft peaks form.  If you want thicker whipped cream, beat until desired consistentcy.  When you remove pie from the fridge, spoon out whipped cream and spread on top, mounding it in the middle and garnish with chocolate shavings, or drizzled chocolate topping or fresh raspberries.  Bon Appetit!

Sunday, January 23, 2011

The Thief Cookie

The Thief Cookie

I received a gift of inspiration this holiday season from a special friend of mine.  She is the kind of friend everyone should have.  We didn't always know each other well until about a year ago, but since then, she and I have come to have the deepest of respect and appreciation for one another.  Her thoughtfulness and quick wit charms me.  She has laughter in her eyes, a terrific smile and a great attitude.  You gotta love that kind of character. 

She gave me a gift in a jar that was the same jar I had given to her this summer when I made pickles.  She said to me, "You never return a jar without something home made in it."  See?  I told you she was thoughtful!  What great advice.  In the jar was a cookie mix with instructions that said to basically add the wet ingredients, mix and bake.  My four year old looked upon the mix like magic in a jar which must be pried open and mixed up immediately.  Make haste!!

Too timid to ask my wonderfully thoughtful and very wise friend for the recipe, I went to work disecting the ingredients and came up with this recipe.  I've now made them three times since the original jar cookie.  Every time I take them from the oven and let them cool on a rack on the kitchen counter, I wonder off to do some laundry or pick up some toys and put them away and I come back to the kitchen and some are missing.  You won't be able to let these cool on the counter before someone is in to them.  It's crazy how fast they disappear and then you have eager guilty faces (usually smeared with crumbs and chocolate) asking you to make more.  Just be sure you get one...or six.

Ingredients
1 C. shortening
2 eggs
3/4 C. sugar
3/4 C. brown sugar
1 t. vanilla
1 3/4 C. flour
1 t. baking soda
1 t. salt
1 C. quick cooking oats
3/4 C. sweetened coconut
8 oz. chocolate chips

Directions

Preheat oven to 375 degrees.

In a standing mixer, cream together shortening, eggs, sugars and vanilla.  Combine dry ingredients in a bowl and mix to combine.  Slowly add dry ingredients (except chocolate chips) to the mixing bowl and gently combine on low speed.  Pull mixing bowl from stand and using a rubber spatula, fold in chocolate chips.  Roll cookie dough into one inch balls and place on cookie sheet.  Bake for 9 minutes or until slightly golden brown.  Remove from oven and place on cooling rack in empty kitchen and don't take your eyes off them  until they are cool enough to handle and store.  Hide them from everyone until devoured.  Enjoy!

Sunday, November 28, 2010

Rocky Road Fudge

Rocky Road Fudge

This recipe reminds me of my mother.  She loved anything that had the name "Rocky Road" in it.  To be honest, I was looking for a fudge recipe to use this holiday season.  My mother used to make it, but I don't have her recipe and she has been gone for eleven years now.  Thank goodness for friends because hours after I mentioned that I was interested in making fudge this year for Christmas, my friend produced a few recipes for me to try.  This one was a winner. 
I love marshmallows, but the original recipe called for way more than I thought appropriate for equal proportions.  When you make this, add as many or as little as you want.  Mix it up and use mint, orange or peppermint extract.  It isn't even December and I have made this three times and if there was any left I would be eating it right now!  Maybe I should make some more, just in case.  As much as I love eating it, it is great to give as a gift.  Which I did just yesterday!

Ingredients
1 bag semi-sweet chocolate chips
1 can sweetened condensed milk
1 t. vanilla
4 oz chopped walnuts or pecans
2 cups small marshmallows

Directions
In a microwave safe bowl, add chocolate chips and sweetened condensed milk.  Microwave on high for 30 seconds.  Stir well.  If the ingredients are not yet completely melted, microwave for an additional 15 seconds.  Stir well.  Stir in vanilla, walnuts and marshmallows.  Spread in your prepared pan and refrigerate for 30 minutes.  Remove wax paper from pan and cut into desired sized squares.  Store in an airtight container for up to two weeks.


Wednesday, November 24, 2010

Pumpkin Pie with Pecan Topping

Pumpkin Pie with Pecan Topping

The holidays are officially here.  Roll up your sleeves and get ready for a wonderful season in the kitchen!  Isn't that the heart of the home where all good things are made? 

For Thanksgiving this year, my family is going to my in-laws for dinner.  I may have mentioned this before about my entire family pitching in to contribute to a great dinner.  Lucky for me, I am in the midst of some great cooks and I learn a lot from them.

This year, I offered to bring the pumpkin pie, among some other things that are tradition in my family.  This is a rather bold move for me because my sister-in-law, Shonnie, makes great pies.  If making a pumpkin pie alone was all I had to worry about I'de be okay, but to top it, her dad makes the "real deal" pumpkin pie straight from the pumpkin!  So, I had to come up with a recipe to top all great pumpkin pies and those made with real pumpkin because I don't have the time to wrestle with one and Libby's is my friend.  At first I was thinking something with rum would be good, but after putting down my eggnog, I came up with THIS!  The biggest mistake you can make right now is to look away.  You and your guests are going to think this is the best pumpkin pie ever.  It's a showstopper and beats the heck out of a cardboard tasting store bought one any day!  For those of you who like pumpkin and pecan pies, it's like getting two for one!

In case you are curious, my other family food traditions for Thanksgiving include my mother's not-so-secret, but very famous cranberry sauce recipe which can be found on the back of the Ocean Spray bag only instead of using water, she used orange juice and cut the sugar by 1/4 cup.  Delish.  Also, the traditional green bean bake with the french fried onions on the top which, not surprisingly, also can be found on the back of the French's can.  Among the blessings in my life that I remember and giving thanks for my family and our health, there is a part of me that thanks the good Lord above for Thanksgiving dinner.  Can't wait!

Ingredients:

Topping
1/2 C. pecan pieces
1/4 C. (packed) brown sugar
1/2 teaspoon ground cinnamon
1/8 t. salt


Filling
1 cup (packed) golden brown sugar
2 large eggs
1/2 teaspoon fine sea salt
1 t. cinnamon
1 t. ginger
1/4 t. cloves
1 can packed pumpkin
1 t. vanilla
1/2 cup heavy whipping cream


Crust
1 12-inch round Pie Crust

Directions:
For topping, combine all ingredients, blend and set aside.  For filling, combine all ingredients and blend until smooth, about two minutes.  Pour into prepared or prebaked pie crust.  Bake pie at 350 degrees for 35 minutes.  Remove pie from oven and reduce the oven temperature to 325 degrees.  Add pecan topping mixture to the top of your pie and place it back in the over to bake for 10 - 15 more minutes.  Keep an eye on the crust and cover slightly with aluminum foil if the crust is browning too much for your taste.  When the pie has completed cooking, set on rack to cool completely.  Refrigerate if you are not going to eat it immediately. Serve with real whipping cream.  Enjoy!

Tree picture courtesy Shane Boyd, 2009.

Thursday, November 18, 2010

Pumpkin Cheesecake

Pumpkin Cheesecake

Thankful

Some days we forget to look around us,
Some days we can't see the joy that surrounds us,
So caught up inside ourselves,
We take when we should give,
So for tonight, we pray for what we know can be
And on this day, we hope for what we still can't see
It's up to us to be the change
And even though we all can still do more,
There's so much to be thankful for.
 - Josh Groban

My house, my table, my turkey.  2010

Two important people in my life dodged cancer this week.  Two people who don't have any idea of each other were both tested for two separate issues and cleared of cancer.   If you were privy to the details of their journies, you too would believe in miracles.  I have been led to a place of grace and thankfulness.  It would make sense that this entry be dedicated to remembrance, thankfulness and blessings.

I consider myself a quiet, humble cook dedicated to learning more culinary skill than I will ever be able to absorb in a lifetime, but I have to tell you, I'm pretty damn good at making cheesecake.   The passion started back in 2002.  I had always been curious about the cheesecake and not having grown up with the indulgence, thought it romantic (my husband says, "romantical".  Is that even a word?) enough to gather tons of recipes and put them in the "One Day" pile.  One day I will make this.   Finally, my one day had come.  It was the December 2002 Dinner Club and I drew the dessert card.   My choice was a chocolate and peppermint cheesecake covered with rich chocolate ganache and sprinkled with broken candy cane pieces.  It was divine.  If you don't believe me, you can ask Stephanie, my Dinner Club friend, who warms me with her memory of this dessert, still, years after I originally made it.  I love that this is a special memory for her.  Since then, I have made several and have come to realize that although I was not seeking it, over time, I had mastered the craft of cheesecakes.  It had become "my thing." 

This is the last I-don't-know-what-to-make-for-Thanksgiving-dessert-and-im-tired-of-pumpkin-pie cheesecake recipes.  So, here we go.  A Pumpkin Cheesecake masterpiece just between you and me. 

Pumpkin Cheesecake

Preheat your oven to 325 degrees.  Read recipe all the way through prior to purchasing your ingredients.

Crust:
1 1/2 sleeves of graham crackers, crushed
1/2 C. sugar
6 T. melted butter

Cake:
3  8 oz. packages of cream cheese
1/2 C. sugar
5 eggs
1  15 oz. can of pumpkin puree
1 t. vanilla extract
1 t. cinnamon
1/2 t. ground ginger
1/4 t. nutmeg
1/2 t. salt

To crush the graham crackers, I put them in a large baggy and use my rolling pin to roll them until they are uniformly crushed.  Add the sugar and mix well.  Pour contents into a heat proof glass dish and add butter mixing to combine.  Pour crust mixture into prepared springform pan.  A springform pan is the one you have in the very back of your bakeware that has a flat bottom and an "O" ring that attaches to form the pan.  These are very cool.  Carefully smooth out the crust, pressing with your fingertips and make sure it is covering the bottom of the pan and that it goes half way up the sides of the pan.  Bake at 325 for 8 minutes.  Remove from oven and set aside.

Using an electric mixer, add cream cheese, sugar and eggs and blend well on medium speed. Beat in eggs one at a time and add puree stirring with attachment until combined.  At this time, add your vanilla extract and spices, cinnamon through salt.  Mix well.  Pour cake contents into springform pan over the prepared crust.  Bake at 325 for an hour and a half.  Check on your cheesecake, but do not open the door.  Opening the door results in loss of heat and your cheesecake will take longer to cook and you will get cracks when cooling.  When your timer goes off, check for doneness by slightly jiggling the cake.  The center should be spingy and move just slightly.  If it wobbles a lot, it's not done yet.  When your cake is done, remove it from the oven and let cool for an hour and a half.  At this time, you can either refriderate or put the icing on.  Do not remove the ring from your springform pan until after you have added the icing and it's been refrigerated for at least an hour.

Icing
1/4 C. sugar
1 tub sour cream

Combine ingredients in a bowl and mix until combined.  Spread over cheesecake making sure its entirely covered.  Refrigerate for at least an hour before eating.  When you are ready to eat, remove cheesecake from the refrigerator and pop off the O ring. 

Enjoy with family and friends.  Oh, and don't forget to say grace.

Sunday, October 31, 2010

Reese's Gingerbread Cake with Maple Whipped Cream

Reese's Gingerbread Cake
with Maple Whipped Cream

This cake is brought to you by my daughter, Reese, age 3.  In order to avoid misconceptions, this cake is not made out of Reese's Peanut Butter Cups.  It is the product of several weeks of begging to make gingerbread man cookies until she wore her poor mother down and I eventually gave in.  One day I asked her if she would compromise and make a gingerbread cake with me for dessert for a dinner party.  Instead of answering the question, she leapt into the air and squealed with an ear bleeding pitch that is still vibrating off the walls of my kitchen.  With her enthusiasm for gingerbread and her excitement at its zenith, she ran over to the lowest drawer I have in the kitchen and got out her apron, her rolling pin and a garlic press.  The apple does not fall far from the tree.

This cake serves about 6 people.  It's dark, moist and can be served with several accompaniments.  My choice was maple whipped cream.  Im not talking about the cream from a can, but real whipping cream with a little sugar and a drop of maple extract, whipped until slightly thick. I simply cannot find the words to describe how wonderful this was with a cup of coffee on the side after a very satisfying dinner.  It was the perfect end to a wonderful evening. Sometimes life is hectic and stressful.  I'm convinced it's these fairytale moments that pull us through it.

You and I are the kind of people who clip the same 'type' of recipe until we have about 18 versions of the same thing.  This recipe is a combination of a few gingerbread cake recipes I have saved over the years. I didn't add cloves because my husband is not fond of cloves, but you can add it, about 1/8 of a teaspoon.  You and I will be making this over and over again.  Let's get started.

Ingredients
1 C. boiling water
1 C. dark molasses
1 t. baking soda
1/2 C. cold water
2 1/2 C. flour
1 T baking powder
1 1/2 t. ground cinnamon
1 t. ground ginger
1 t. salt
1/2 C. shortening
1 C. firmly packed brown sugar
2 eggs

Ingredients for cake topping
powdered sugar for dusting
1 pint whipping cream
1 T sugar
1 t. maple extract

Directions for cake
In a heat proof bowl (I used a Pyrex), add one cup of boiling water, molasses and baking soda.  Stir until combined.  It will be foamy.  Stir in 1/2 cup cold water.  In a small bowl, combine flour, baking powder, cinnamon, ginger, and salt.  If you are putting in the 1/8 cloves, do it here.  In a separate mixing bowl, mix shortening and brown sugar until well blended.  Beat in eggs.  While mixing on low, add molasses mixture.  Add dry ingredients until just combined.  Pour batter into prepared, 9 inch square baking pan.  Bake for 50 minutes.  Remove from oven when done and let cool in pan for about an hour and a half.  Remove cake from pan by placing plate or cake stand inverted over top and flip over until right side up.  Carefully lift cake pan.  Serve with maple whipped cream.

Directions for Maple Whipped Cream
In a glass mixing bowl, pour in whipping cream, sugar and maple extract.  Whip with a handmixer until thick.  Do not overmix. 

To prepare dessert on plates, place one slice of cake on plate, dust with powdered sugar, add whipped cream.  Serve.  It's so good!

Tuesday, October 19, 2010

Maple Oatmeal Scones

Maple Oatmeal Scones

I made these scones late one evening this week.  Everyone had gone to bed already and I was up trying to get work off my mind.  Before too long, the sweet aroma of maple was drifting though the house. 

A tree line on my property. 
Picture taken in Fall 2009.
As a little girl, I remember being tucked in my bed upstairs for the night and my mother would be downstairs in the kitchen making wonderful things that filled up the house with warmth and dreamy memories.  Oh, my sweet reverie.  The reflection of my history carries me back to a time when my world was carefree, playful and free of responsibility.  I wonder if it is those memories coupled with the fragrance of days gone by that delivers us to that restful state of happiness and blissful relaxation and contentment.  That feeling of being at peace.  The feeling of home.


Barn and Mount Baker, 2009
Ingredients
1 3/4 C. flour
1/2 C. whole-wheat flour
3/4 C. quick cooking oats
3 T. sugar
1 T. baking powder
1 t. salt
2 sticks cold butter (1/2 lb), cubed
1/2 C. buttermilk
1/4 C. maple syrup
1 t. maple extract
2 eggs

Glaze
1 1/4 C. powdered sugar
1/2 C. maple syrup
1 t. maple extract

Directions
Preheat oven to 400 degrees.  Using your electric mixer, add the flours, oats, sugar, baking powder and salt.  Blend together until mixed.  Add cubed butter and mix on low until the dough looks like small pieces.  Add the buttermilk, syrup, extract and eggs and blend until just combined.  Do not over-mix or your scones will be tough.  Remove dough carefully from mixing bowl onto floured surface.  Cover hands and rolling pin with flour and roll out dough to 1/2 inch thick.  Cut in circular shape using large round cookie cutter or in triangles.  Place on prepared cookie sheet.  Bake 15 to 18 minutes or until edges just start to brown.  When warm, but not hot, drizzle glaze over the tops and let them cool to set.  Makes 18.

Enjoy!

Saturday, October 9, 2010

Hazelnut and Ginger Biscotti with Chocolate Icing

Hazelnut and Ginger Biscotti with Chocolate Icing

I make biscotti around this time every year.  It is great to have on hand when you have company and it's fun to give away.  Maybe you borrowed something from a friend, or they left their casserole dish at your house, or you are leaving dinner on your friends front porch; tuck these inside to let your friends know that you are thinking of them and how thankful you are for their friendship.  At Thanksgiving or Christmas, you can wrap them in cellophane, tie them with a bright ribbon and put them in a basket with a bag of  your favorite coffee and give as a gift.  They're even fun to make!  You will be surprised how easy they are!

Hazelnut and Ginger Biscotti with Chocolate Icing
Ingredients
2 C. flour
1 C. sugar
1 t. baking soda
1 t. salt
3 eggs
2 t. vanilla extract
1 C. chopped, toasted hazelnuts
1/3 C. finely chopped crystallized ginger
1 1/2 C. chocolate chips

Directions
Preheat oven to 350 degrees. 
Line baking sheet with parchment paper or silpat.  Sift flour, sugar, baking soda and salt together.  Set aside.  In a mixer, combine eggs and vanilla and beat until blended.  Add dry mixture, hazelnuts, and ginger.  Mix until just combined.  Turn dough out onto floured work surface and work dough into a ball.  Split the ball in half.  Roll each half into a log shape and place each lengthwise on baking sheet.  Press rolls slighty using flat fingers.  Place in over and cook for 35 minutes.  Remove from oven.  Cool for 10 minutes.  Using a knife, cut biscotti crosswise into 1 inch sections.  Turn each on side and place cookie sheet back in oven for another 12 minutes.  Remove from oven and transfer biscotti to cooling rack.

When biscotti is completely cooled, they will be ready for their chocolate coating.  Take a sheet of wax paper and place it on a cookie sheet*. In a double boiler, melt chocolate chips, stirring frequently with heat-safe rubber spatula.  Take each piece of biscotti and dip flat side into chocolate using left hand.  In your right hand, lightly run your spatula down the new chocolate coating and place biscotti chocolate side down on the sheet of wax paper to cool.  To store, put them in the refrigerator in airtight containers or freeze for up to one month.

*The reason you place them on a cookie sheet is so you are able to move them to a place to continue to cool. 

Tuesday, September 21, 2010

September Dinner Club - "Masquerade Theater"

September 2010 Dinner Club
“Masquerade Theater”


It's been nine years this month that my girlfriends and I have been participating in Dinner Club.  I chose to host September.  I usually have October because I love Halloween, but this year I thought I would give October up and try another month.  The host gets to pick their own theme and the rest of us are adventurous and usually exhibit good sportsmanship, so we just go with it and see what the evening brings.  My theme, "Masquerade Theater" just came to me.  I'll explain how it works.

I chose six genres; Action & Adventure, Romance, Horror, Drama, Comedy and Foreign.  I wrote them all on separate pieces of paper.  Then I wrote down all the components of the dinner: Appetizer, Entree, Salad, Side Dish, Beverage and Dessert.  Lastly, I wrote the names; Tina, Tracy, Jeni, Stephanie, Kathy and Trisha.  Since the hostess gets the entree, I left those out and had a friend draw my theme.  It came out, "romance".  How fitting.  Therefore, I had the "Romantic Entree".  The others were, Action & Adventure Appetizer by Stephanie, Salad of Horror by Tracy, Dramatic Side Dish by Kathy, Beverage of Comedy by Tina, and a Foreign Dessert by Jeni.  The goal was to make your contribution closely resemble that of the genre.  All of the pairings turned out good.  I thought the Salad of Horror would be the most difficult and the foreign dessert sounded like bliss.  My Dinner Club friends told me that out of all the Dinner Clubs we have been doing over the years, this was the most challenging and the most difficult.  We had met our match.  It thrilled me to hear that.  That was my goal!

I wrote up a menu based on the theme and the recipes they chose.  I created a program scroll keepsake that read as follows:

ACTION and ADVENTURE
Appetizer by Stephanie
This riveting dish will put you on the edge of your seat! So moving, it’s almost 3D! Her choice was inspired by the active preparation of the ingredients and the adventure of putting it all together! Autumn Apple Appetizer Bites

ROMANCE
Entrée by Trisha
Sicilian Meatballs with Homestyle Marinara  obtained from a Sicilian family that is rumored to have ties in the mob. Her choice was inspired by the romantic interlude that occurs in Walt Disney’s “Lady and the Tramp.”


HORROR
Salad by Tracy
Baby mozzarella, assorted baby heirloom cherry tomatoes, baby basil with dressing made from a 30 year aged balsamic vinegar. Her choice was inspired by the movie “Rosemary’s baby.”


DRAMA
Side Dish by Kathy
Pastry piped potatoes served in individual ramekins. Her choice was Inspired by the dramatically crafted presentation!

COMEDY
Beverage By Tina
Individualized bottles of wine adorned with comedic lables crafted by Tina herself and inspired by the character and personalities of her fellow Dinner Club members.

FOREIGN
Dessert by Jeni
Three layer traditional German Chocolate Cake with cocoa filling and chocolate icing. This cake will whisk you back in time as the recipe was published in 1915 in a cookbook titled, “Mary at the Farm and Book of Recipes” by John Hartenstein. Her choice was inspired by German chocolate.


Being that my Dinner Club was so close to Halloween, I was able to decorate with masquerade masks.  For a centerpiece that had a special "theater" effect, I found Shakesperian quotes on a website and printed them off the internet onto cream colored paper.  I carefully tore the edges, top and sides, and taped them to clear glass vases.  Place your tealight in the center and you have a glowing, theatrical effect that your guests can have fun reading. 

Our next Dinner Club is scheduled for November 13th.  Tina will be hosting and the theme is Russian.  I have the side dish!  Can't wait!